
*FOR THE NON-TECHNICAL:
A couple of issues first. This is simple, you are able to do it. I simply wish to outline some phrases for you.
Domain: Is mainly the title of the web site. In your e mail, the area title is every thing that comes after the “@” image.
URL: Universal Resource Locator. Everything you sort in to get to the precise area or the precise pages inside the area.
google.com could be a site. could be the URL.
If I needed to go to Gmail, google.com continues to be the area. The URL could be If you sort within the URL it should truly take you to the google area.
So after I say “customized web site area” I imply a web site that’s discovered by typing no matter you determine must be typed (assuming availability) into the browser handle bar. For a résumé, I’m assuming this could be your title.
A pair years in the past I created an internet web page the place I tried to broaden past what I put into my conventional résumé. I’m not a designer so it isn’t fairly, however JoshuaRender.com was born.
It didn’t begin out as my personalized area resume, nor did I actually got down to create a résumé utilizing my very own title because the URL. I stumbled upon a free service that allow you to create easy net pages. It would put them on the Internet utilizing a random URL from its personal net area. For $19 a 12 months that they had a premium choice that, amongst different issues, allowed you to make use of no matter area title you needed.
If you prefer to the free model and random URL to get to your résumé, simply navigate your browser to an account, comply with the directions, and use the drag and drop instruments to construct your net web page. That’s all it is advisable do.
Creating Your Web Résumé With Customized Domain
1. Navigate to
Create an account. You will begin with the free web site. The URL will probably be a collection of letters and numbers utilizing their area. To use a customized area with this web site you need to subscribe to the paid model. It prices $19 a 12 months.
2. Getting A Custom Domain
You don’t truly purchase a site. You lease it. You can lease it for a number of at a time or you’ll be able to lease it yearly. The simplest way to do that is to go to an organization that offers with area registration. I have a tendency to make use of Google Domains now and for this tutorial that’s who I will probably be utilizing.
Click on the hyperlink to Google Domains or sort the URL into your net browser:
To purchase a site it may well value from $12 a 12 months to much more than $12. Using a easy “.com” and you ought to be okay on the value, however your chosen title should be out there. So the very first thing you do is conduct a seek for a site to make sure availability.

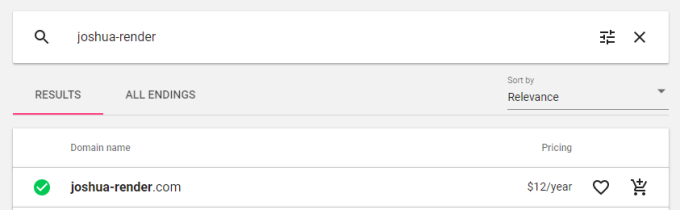
Once you discover one that’s out there, it is so simple as paying for it and offering issues like your title and handle for area registration functions. You can select to lease the area for higher than one 12 months throughout the checkout course of.
3. Link Your Custom Domain to Your Web Page
This is probably the most technical half. If it doesn’t work instantly, don’t get pissed off. It can take a few hours to enter impact. You gained’t doubtless be capable to navigate to your new résumé proper after linking the area and your carrd.co net web page.
Go again to the account you created on carrd.co. You must have constructed a web site for this to work. You want to pick “Use my very own Domain” beneath the save function from inside the web site enhancing part. There will probably be a spot so that you can sort in your area title. So in case your area is “joshuarender.com” I might sort “joshuarender.com” in that discipline.
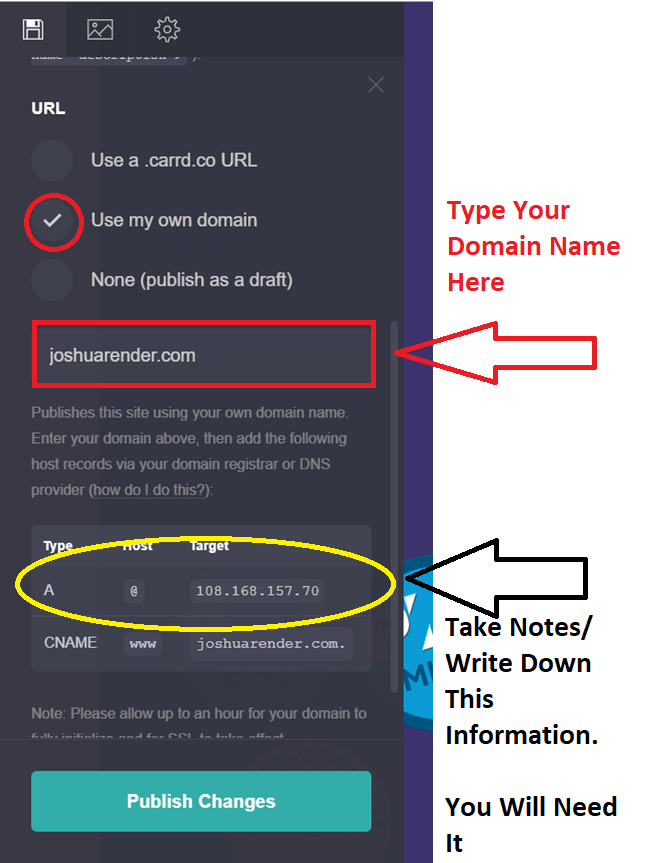
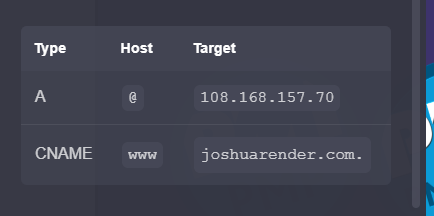
Your “CNAME” ought to simply be your area title. You must be aware of the goal IP handle for the “A” row and the Target for the “CNAME” row. In the picture, the IP handle is “108.168.157.70”.
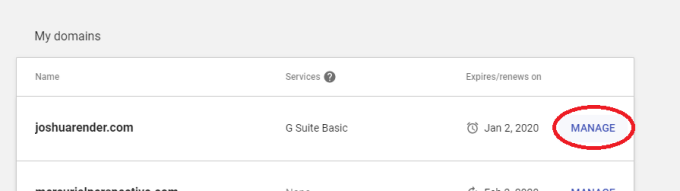
Now it is advisable return to . Click the large button on the top-right that claims “Manage My Domains”.
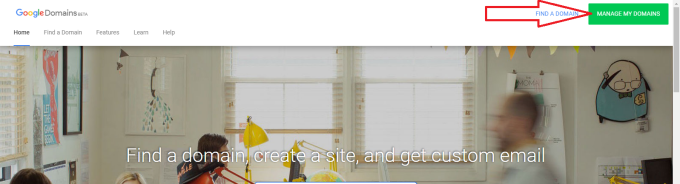
That will take you to a display the place all the domains you’ve leased may be managed.

Find your new customized area after which click on the “Manage” button subsequent to it.
To hyperlink your carrd.co net web page to your new area, click on the “DNS” button on the following display.

Once on the DNS web page, scroll all the way down to the Custom Resource Records part.
The notes you took earlier for “CNAME” and “A” goal addresses, you’ll use these right here. Add entries in to appear to be mine beneath within the picture – simply substitute your area title and your IP handle from the carrd.co web site. Your IP handle from carrd.co stands out as the identical as mine as they host a gaggle of websites on the identical servers.

For every entry, click on “ADD” guaranteeing it matches the knowledge you famous earlier.

The “A” row goal quantity and the “CNAME” goal is required
And that’s all. Within a few hours, you must be capable to navigate to your new web site utilizing a customized area title.